

How To Finish Live Edge Wood
Somehow, you’ve come across a large, lovely slab of live edge wood that’s perfect for creating handcrafted solid wood furniture. First, congratulations! Live edge wood has an innate beauty and solidity that brings gravitas and elegance to any room with its natural beauty. Even with its flaws and inconsistencies (or perhaps because of them), live edge wood makes for gorgeous, one-of-a-kind furniture pieces. Your next step is to take the wood to your workshop to sand, plane, smooth, stain, and finish it. But perhaps you’re experiencing a little stage fright, worried that you’ll turn your slab into several pieces of scrap wood. Not to worry—here are a few tips on how to finish live edge wood.
Clean, Dry, and Bug-Free
If you’re buying a slab of live edge wood that has already been treated, that’s one less thing on your mind. If you’re buying a raw piece of wood, however, you must ensure it’s been heat-treated and kiln-dried. Most live slabs are from trees that have been rejected for lumber for any number of reasons, such as disease and odd features. As such, live edge wood slabs may not have been kiln-dried to ensure all the moisture is out of the wood. This shrinks the wood down and ensures it’s less likely to split or crack. Heat treatment is done to kill any insects potentially living in the wood. After working for several weeks on your wood slab, you don’t want any nasty surprises like these down the line. Also, before you start, allow the wood to get used to the heat and humidity of your home.
Remove the Bark and Sand It Down
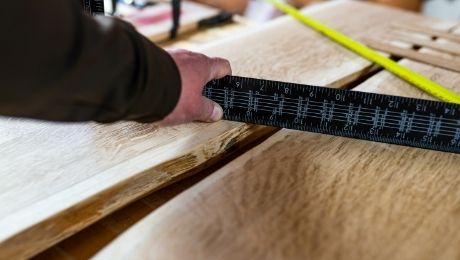
When it’s finally time to work on the wood, check the measurements for your project and use a circular saw to bring the wood to the proper dimensions. Next, take off the bark and sand the wood on all sides. You’ll need several tools for the process, including a chisel, sander, and some 120-grit sandpaper to touch-up hard to reach spots. Carefully work along the edge, not across it. Gouges can be patched, but it’s better not to make them in the first place. Sand the sides and sharp edges. Most sites recommend slowly using increasing grades of sandpaper as part of how to finish live edge wood.
Smooth the Face, Repair Splits
This requires a plunge router and jig, followed by more sanding. It’s not necessary to sand and rout both sides of the wood, but if you want a consistent smoothness on both sides, do it. If there are splits in the wood on top or bottom, use butterfly joints to hold it together before applying a filler of epoxy. If there are spaces inside the wood with loose bits of bark or the like, clean them out before filling the voids with epoxy. Let the epoxy harden before sanding it flat. Remove all dust, then proceed to shellac and lacquer the wood. Let it sit for a few days before turning the slab into whatever its final handcrafted solid wood furniture form will be!